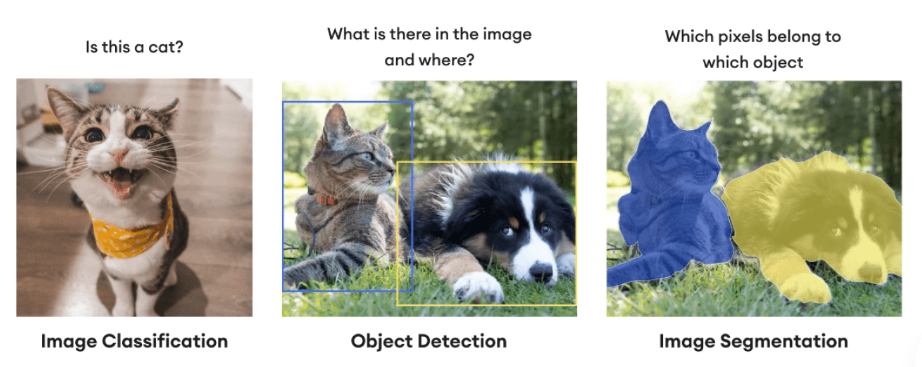
Object Detection
1. Overview
YOLOv11 is the latest-generation object detection model released by Ultralytics, delivering an exceptional balance between speed and accuracy. When deployed locally on NVIDIA Jetson devices (such as Orin Nano, NX, or AGX), YOLOv11 enables efficient, low-latency AI inference optimized for edge environments.
This guide covers:
- Preparing the environment and installing JetPack
- Running YOLOv11 quickly using Docker
- Installing YOLOv11 and its dependencies locally
- Accelerating inference with TensorRT
- Leveraging DLA acceleration and benchmarking performance
YOLOv11 runs exceptionally well on devices such as the Jetson Orin Nano, offering a powerful solution for real-time edge AI deployment.
2. Environment Preparation
Hardware Support
| Device | Supported JetPack Version | AI Performance |
|---|---|---|
| Jetson Nano | JetPack 4.6.x | 472 GFLOPS |
| Jetson Xavier NX | JetPack 5.1.x | 21 TOPS |
| Jetson Orin NX 16GB | JetPack 6.x | 100 TOPS |
| Jetson Orin Nano Super | JetPack 6.x | 67 TOPS |
For optimal results, it is recommended to use JetPack 5.1 or later and enable maximum performance mode:
sudo nvpmodel -m 0
sudo jetson_clocks
3. Quick Start via Docker(Recommended)
The fastest way to get started is by using the prebuilt Docker image provided by Ultralytics. Run the following commands:
sudo docker pull ultralytics/ultralytics:latest-jetson-jetpack6
sudo docker run -it --ipc=host --runtime=nvidia ultralytics/ultralytics:latest-jetson-jetpack6
Includes YOLOv11, PyTorch, Torchvision, TensorRT, and other required dependencies.
4. Local Installation YOLOv11 (Optional)
This option is intended for users who need a customized environment.
Step 1: Set Up the Python Environment
sudo apt update
sudo apt install python3-pip -y
pip install -U pip
Step 2: Install the YOLOv11 Package
pip install ultralytics[export]
Step 3: Install Compatible PyTorch and Torchvision
While ultralytics automatically installs PyTorch and Torchvision, the pip-installed versions are not compatible with ARM64-based Jetson platforms.Instead, you need to manually install a prebuilt PyTorch wheel and build Torchvision from source.
Example: JetPack 6.1 + Python 3.10
pip install https://github.com/ultralytics/assets/releases/download/v0.0.0/torch-2.5.0a0+872d972e41.nv24.08-cp310-cp310-linux_aarch64.whl
pip install https://github.com/ultralytics/assets/releases/download/v0.0.0/torchvision-0.20.0a0+afc54f7-cp310-cp310-linux_aarch64.whl
Install cuSPARSELt to Resolve Torch 2.5.0 Dependency:
wget https://developer.download.nvidia.com/compute/cuda/repos/ubuntu2204/arm64/cuda-keyring_1.1-1_all.deb
sudo dpkg -i cuda-keyring_1.1-1_all.deb
sudo apt-get update
sudo apt-get -y install libcusparselt0 libcusparselt-dev
Verify PyTorch Version and GPU Availability:
python3 -c "import torch; print(torch.__version__)" # 2.5.0a0+872d972e41.nv24.08
python3 -c "import torch; print(torch.cuda.is_available())" # True
Step 4: Install ONNX Runtime (GPU)
To find all available onnxruntime-gpu packages —organized by JetPack version, Python version, and other compatibility details—in the Jetson Zoo ONNX Runtime Compatibility Matrix. In this example, we will download and install onnxruntime-gpu 1.20.0 with support for Python 3.10.
pip install https://github.com/ultralytics/assets/releases/download/v0.0.0/onnxruntime_gpu-1.20.0-cp310-cp310-linux_aarch64.whl
5. Accelerating YOLOv11 Inference with TensorRT
Ultralytics supports exporting YOLOv11 models to TensorRT engine files (.engine),to significantly improve inference performance.
Python Example
from ultralytics import YOLO

model = YOLO("yolo11n.pt")
model.export(format="engine")  # 生成 yolo11n.engine

trt_model = YOLO("yolo11n.engine")
results = trt_model("https://ultralytics.com/images/bus.jpg")
CLI Example
# Export a YOLO11n PyTorch model to TensorRT format
yolo export model=yolo11n.pt format=engine # creates 'yolo11n.engine'
# Run inference with the exported model
yolo predict model=yolo11n.engine source='https://ultralytics.com/images/bus.jpg'
6. Using DLA (Deep Learning Accelerator)
Some Jetson devices feature built-in DLA (Deep Learning Accelerator) cores that enable lower power consumption and improved parallel inference.
Python Example
model.export(format="engine", device="dla:0", half=True)
CLI Example
# Export a YOLO11n PyTorch model to TensorRT format with DLA enabled (only works with FP16 or INT8)
# Once DLA core number is specified at export, it will use the same core at inference
yolo export model=yolo11n.pt format=engine device="dla:0" half=True # dla:0 or dla:1 corresponds to the DLA cores
# Run inference with the exported model on the DLA
yolo predict model=yolo11n.engine source='https://ultralytics.com/images/bus.jpg'
Note: Some model layers may not run entirely on the DLA and will fall back to GPU execution if unsupported.
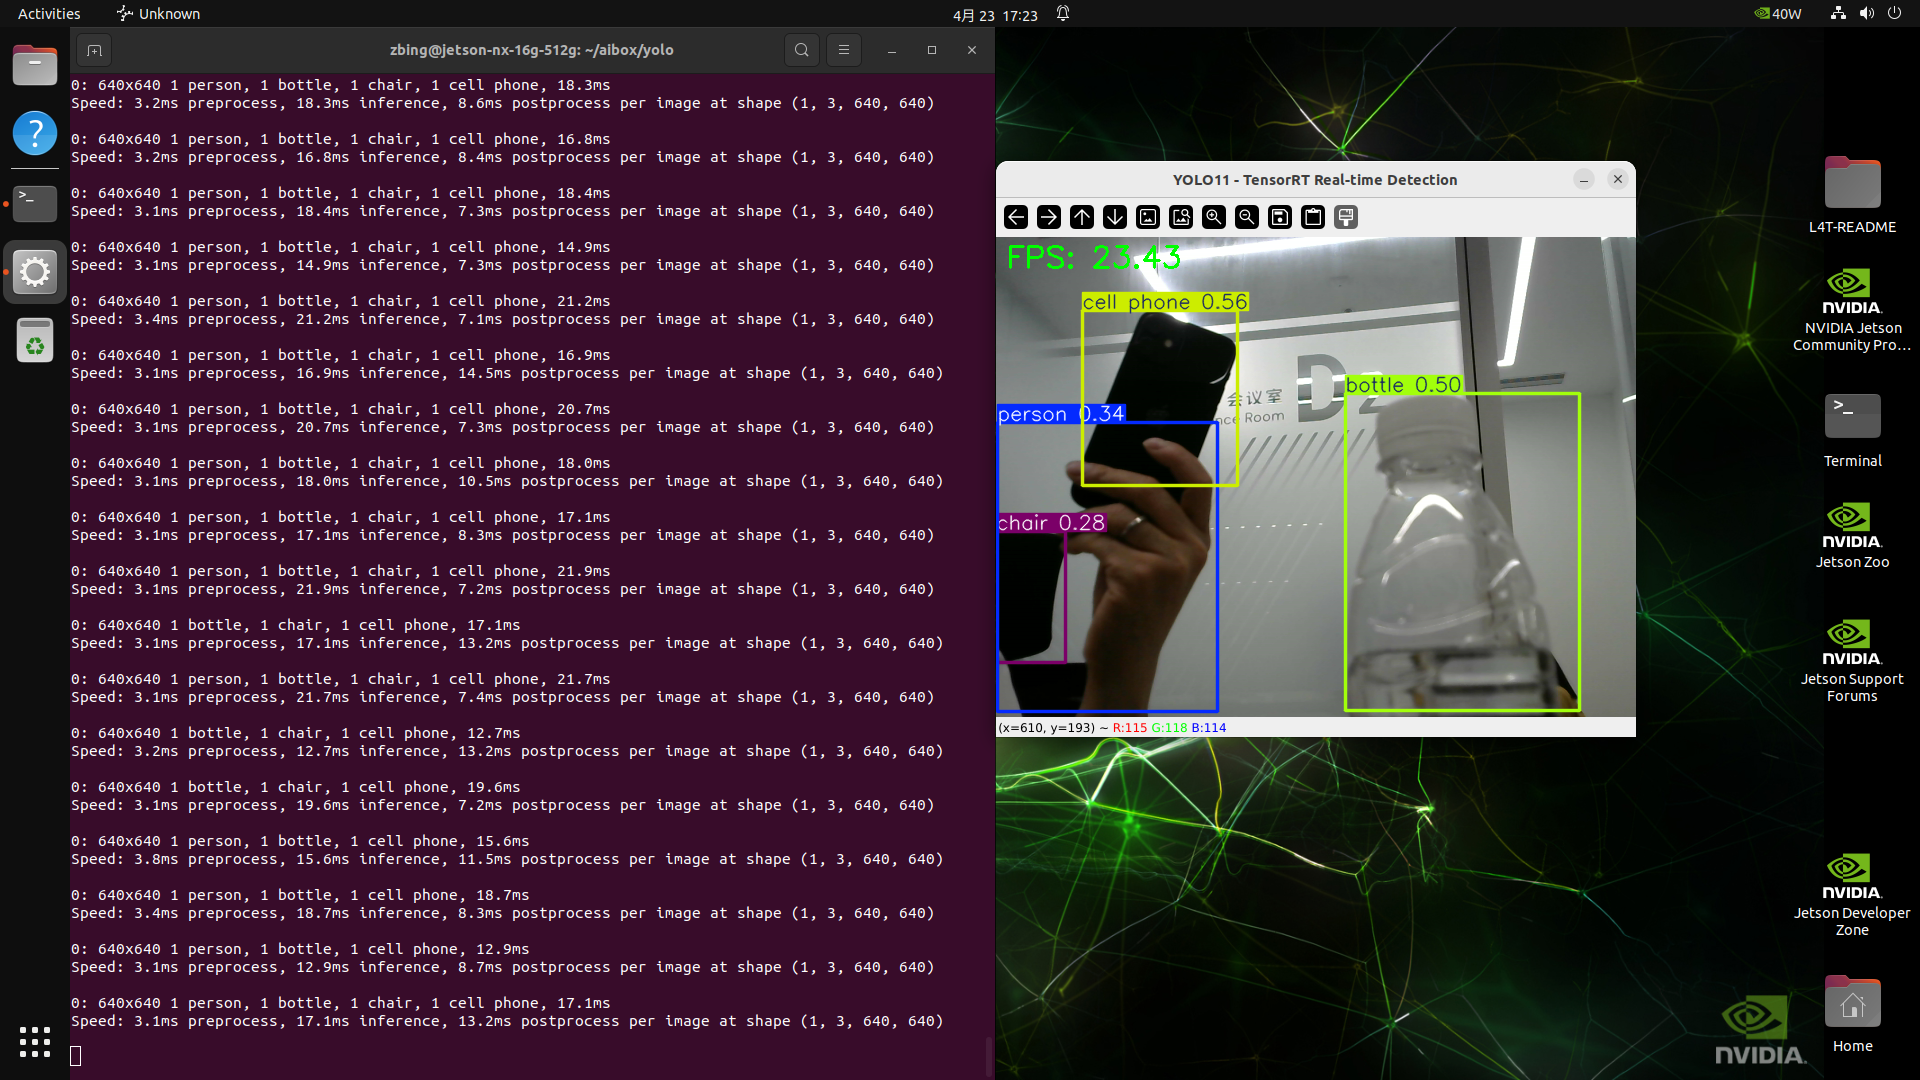
7、object detection Example
import cv2
import time
from ultralytics import YOLO

# Load the TensorRT engine model (exported from YOLO11)
model = YOLO("yolo11n.engine")  # Replace with the path to your .engine model

# Open the USB camera (usually /dev/video0)
cap = cv2.VideoCapture(0)

# Set camera resolution (match model input size for best performance)
cap.set(cv2.CAP_PROP_FRAME_WIDTH, 640)
cap.set(cv2.CAP_PROP_FRAME_HEIGHT, 480)

# Initialize FPS calculation variables
fps = 0.0
frame_count = 0
start_time = time.time()
# Check if the camera opened successfully
if not cap.isOpened():
    print("❌ Cannot open camera")
    exit()
print("📸 Real-time detection started. Press 'q' to quit.")
while True:
    # Read a frame from the camera
    ret, frame = cap.read()
    if not ret:
        break
    # Start time for inference
    t0 = time.time()
    # Run inference
    results = model(frame)
    # Plot the results (draw bounding boxes, labels, etc.)
    annotated = results[0].plot()
    # Calculate FPS
    frame_count += 1
    t1 = time.time()
    fps = 1. / (t1 - t0)
    # Draw FPS on the frame
    cv2.putText(annotated, f"FPS: {fps:.2f}", (10, 30),
                cv2.FONT_HERSHEY_SIMPLEX, 1, (0, 255, 0), 2)
    # Show the annotated frame
    cv2.imshow("YOLO11 - TensorRT Real-time Detection", annotated)
    # Exit on 'q' key press
    if cv2.waitKey(1) & 0xFF == ord("q"):
        break
# Release camera and close display window
cap.release()
cv2.destroyAllWindows()
7. Benchmark Performance Comparison
| Model Format | Orin Nano(ms) | mAP50-95 | Orin NX(ms) |
|---|---|---|---|
| PyTorch | 21.3 | 0.6176 | 19.5 |
| TorchScript | 13.4 | 0.6100 | 13.03 |
| TensorRT (FP16) | 4.91 | 0.6096 | 4.85 |
| TensorRT (INT8) | 3.91 | 0.3180 | 4.37 |
✅ TensorRT (FP16) achieves the best balance between speed and accuracy. ⚠️ INT8 offers the fastest inference speed but with a significant accuracy drop.
8. Optimization Tips
| Optimization | Recommended Command |
|---|---|
| Power Mode | sudo nvpmodel -m 0 |
| CPU/GPU Frequency | sudo jetson_clocks |
| System Monitoring | sudo pip install jetson-stats → jtop |
| Memory Management | Use swap efficiently, clean cache when needed |
9. Troubleshooting
| Issues | Solution |
|---|---|
| Cannot import PyTorch after installation | Make sure you're using the .whl package specifically built for Jetson |
| TensorRT inference is slower than expected | Check if jetson_clocks is enabled and use FP16 mode |
| Failed to pull Docker image | Ensure Docker is properly installed and run with --runtime=nvidia |
| No module named 'tensorrt' in virtual env | Copy the package from host to venv: cp -r /usr/lib/python3.10/dist-packages/tensorrt your_venv/lib/python3.10/site-packages/ |